Getting Started
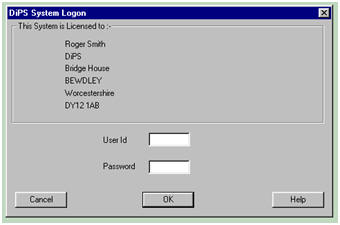
The logon dialog box will appear each
time the program is started. Both the User Id and Password fields
must be must be answered.
The User Id will set the relevant style for that user, setting
screen positions and headings.
As
part of the logon routine a Project Id dialog box will appear
in order to set a name to identify the automatic backup files
created. This Project Name by default is set to the Study Title. This may be changed to any text
of 40 characters or less. It cannot be re-set again for this session
of the program.
Different activity modes and
other options can be chosen using the basic menu items across the
top: File, Edit, System Attributes, Klusters, Travel, Warefrom,
Routes, Style, Refresh and Help.
File Menu - For activities such as loading
data, saving files, and deleting data.
Edit Menu - Used to access Kingpin Mode
and to create and change study data and basic
parameters.
System Attributes - Change some default parameters and facilities that
affect the whole study.
Klusters - is a way of grouping very large volumes
of data to make analysis easier.
Travel Menu - has dialog entry for Road Speeds and options to calculate times
and distances between locations.
Warefrom
Menu - Used to access Whatinsq Mode and
options to set depot boundaries using
supply chain costs.
Routes Menu
- used to access
Egotrip Mode and set routing parameters and plan vehicle schedules.
Style Menu
- has options to alter the information displayed: changing
headings and mapping options.
Refresh Menu - options to refresh graphics and
reset window positions
Help menu - has an on-screen display help manual.
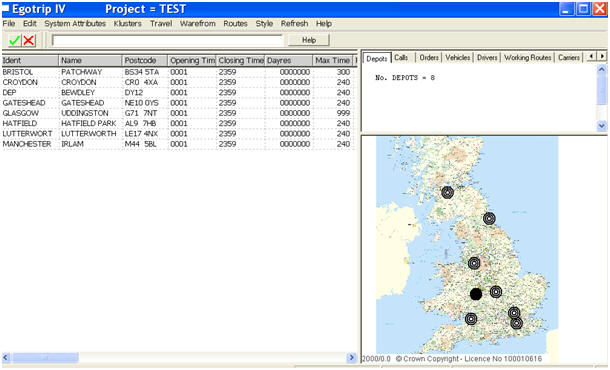
Kingpin mode is
selected from the Edit menu. The screen will change
to display 3 panels - Graphics, Summary panel and Data
grid on the left.
The initial display will be for depots; to change the view to see
any other items, click on the appropriate tab on the Summary Panel.
The details will be displayed in a spreadsheet view.
Double
click with the left hand button to display a depot or call dialog as
necessary. To change the information on display, use the Style menu
and move to Kingpin Headings and select the option to display the dialog window.
Once the
required information is displayed in Kingpin mode it may be amended
by use of the edit field in the toolbar area. Clicking on the
appropriate cell will display the details, which can then be amended
as required. It is also possible to select a range of cells using
the LHB with either the CTRL key or by holding down the LHB and
selecting the appropriate range, and change values for all
highlighted fields. Click on the tick box to change values or the cross to abort. To select an entire column
of data to change, click the RHB on the heading and all values for
the selected data type will be highlighted. Arrow Cursor keys can
also be used to move round the fields (Up, Down, Left, Right, Home ,
End).
Details that
cannot directly be amended are displayed in grey text. These are
often fields that are calculated depending upon other values. Any
related values will automatically be updated where possible.
A menu option
may be displayed by clicking the RHB on any cell. This menu will
allow Create, Properties, Search or Delete for any data type.
Egotrip mode is
selected from the Routes menu.

Open an existing route: Left click on the route number
in the Summary View to display it in the top panel; double click on a route
to show it in the middle route panel or triple click to display it in a
pop-up box.
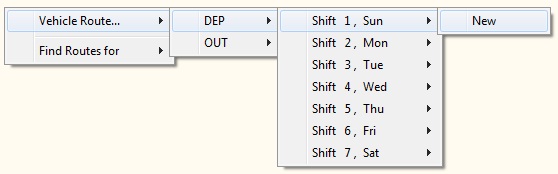
Create a route: Right click in either of the
route panels to display a set of menus to display all the current routes. As the mouse
cursor is moved over an item the next level of menu
automatically appears.
Add calls to a route: Highlight any calls you have
either from the deferred list or another route, hold the right mouse button
down, and drag the call/s to the route and position you want.
Optimise a route: To automatically optimise a
route with calls on, right click on any of the calls in the route
and click Optimise Trip Sequence
View trip on map: To view the a route on a pop map,
right click on any of the calls in a route and click Popup graphic ZOOMED to
this trip
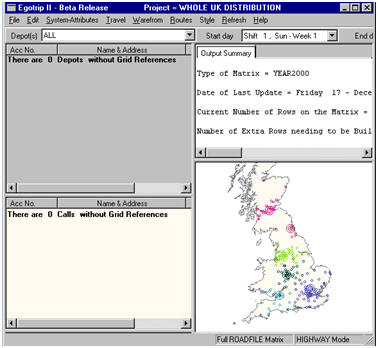
Highway Mode is selected from the Travel Menu.
Highway Mode may be used to
easily identify and then locate calls or depots without valid
grid reference locations. It will display an Output Summary Panel, graphics
image, and text panels for calls and depots.
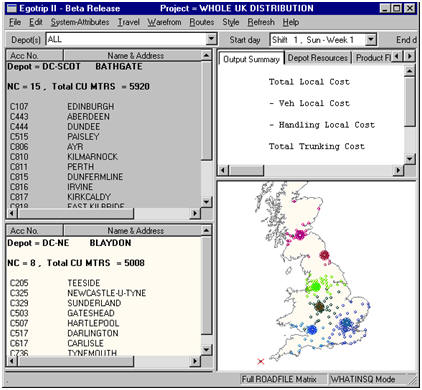
This mode is selected from the Warefrom menu. When selected, it will load
all the selected depots and calls and construct a scaled graphical image of
the area to be examined showing the current allocation of calls to depots.
(In DiPS every call must have an “owning” depot that is used as the primary
source of any delivery or collection.) The current or ASIS” situation can be useful for verifying any data mistakes (incorrect
postcodes) or checking depot product throughput in the Depot Resource
summary tab.
A list of the calls allocated to each depot may be displayed in either of
the two text panels on the left hand side. Calls may then be moved between
depots either using text panels to drag calls or graphically by drawing
boundaries or clicking on calls on the map display.
The Anyware menu option is
also available to calculate a “best” single depot site to serve the calls in
question